
Garment Designer is a creative and capable pattern making program. Once you are comfortable with the software you can make a pattern in a matter of minutes!
But sometimes we just want to save more time by creating master pieces or templates that can be easily found and easily retrieved.
So, what defines a template? In my opinion:
- It is a pattern piece that is somewhat generic and used often in patterns (e.g. a certain pocket style)
- It is ‘generic’ and doesn’t not have to be attached to any given pattern
- It can be used with multiple styles
- It reflects one’s personal tastes in style (e.g. a neckline)
- It can be saved as a separate file in a chosen folder so it is easily found
- It is often can be built with one of the Generic Shapes (e.g. a triangular godet)
- It may reflect particular fitting issues that you have taken the time to adjust in a pattern
Why Use them?
- You have already worked out your style preferences
- They have been tested and proven
- You have already adjusted the pattern for a particular situation or for fit
- They are a quick go-to
Suggested Approach to Making Your Own Pattern Template
- Start by creating a folder where you will save all your Master Templates. I keep this folder in my master pattern folder where I keep all my designs.
- Then, as you build what you would consider a Master pattern piece, you can save it to this folder.
- Print out the piece and confirm its perfection. Once you are happy, you might want to consider mounting it to tag board (or similar) and recut the pattern. This will extend the life of the template pattern for multiple uses, and you can simply just trace it if you like.
- Keep all your master pattern paper pieces together in one envelope or on one pattern hook for easy retrieval.
Some General Comments
- Usually, I build the template piece as part of a bigger pattern. Then, I save the file again into my master program, and when I can, I turn off the pieces that it is not necessary to see.
- Sometimes, depending upon how you build a pattern template, you cannot hide the garment piece it is attached to in the program. A good example would be pockets. Pockets in Garment Designer need the Front Bodice piece displayed.
My Favorite Master Patterns
Below are a few of my favorite master patterns:
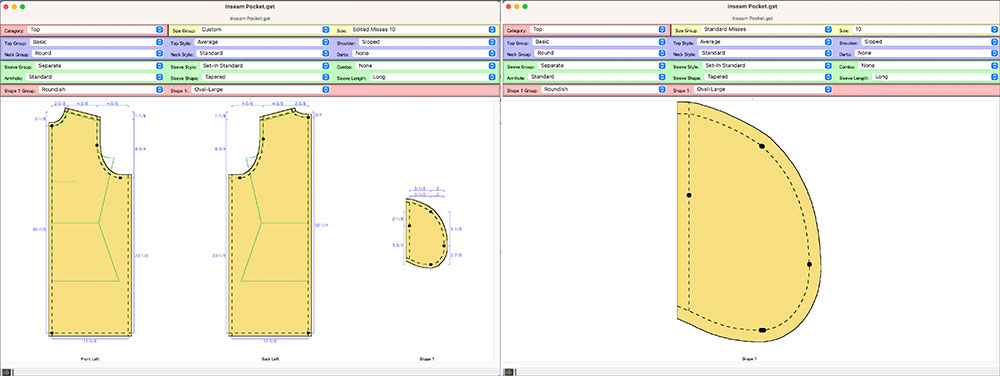
Inseam Pocket
Garment Designer has in-seam pockets on the Bottoms, but not currently on the Tops. So, why not build one that you keep on hand for general use.
My example here was built using a generic rounded shape. I started by measuring an in-seam pocket on a ready-to-wear garment. Then, I added a generic shape (using the Extras menu), choosing the rounded option and I manipulated the shape until it looked like the pocket on the garment. A quick print and test confirmed it. Because I used a generic shape to build the pattern, I could turn off all the other pattern pieces and just display the pocket only.
For your convenience, I am sharing my pocket pattern with you. Click here to download the Garment Designer file.
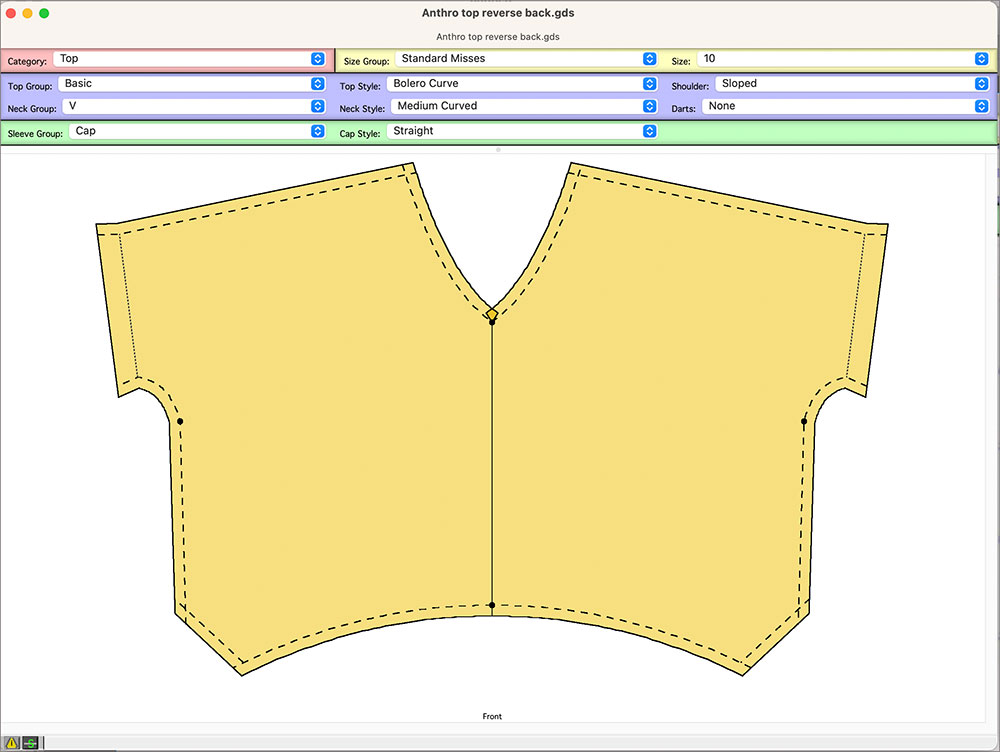
Favorite Neckline Anyone?
We all probably have a garment with a neckline that seems just perfect. It is the right width and depth. It is flattering and suits our body and facial shape. So, why not create a master template that you can use when you want to adjust another neckline ‘on the table’. By that, I mean that you are making a different garment and you decide the neckline is not exactly correct. So, simply pull out your template and if the neckline of the original is appropriate, recut the neckline on the garment.
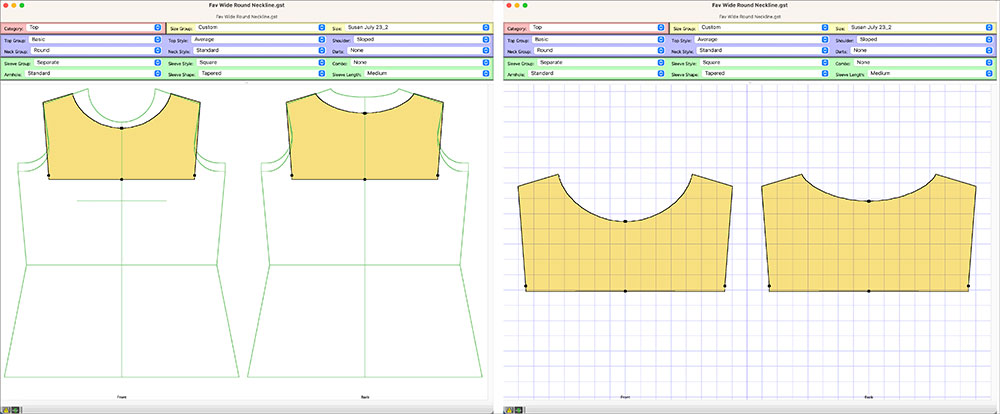
Below, you can see how I use this in a project.
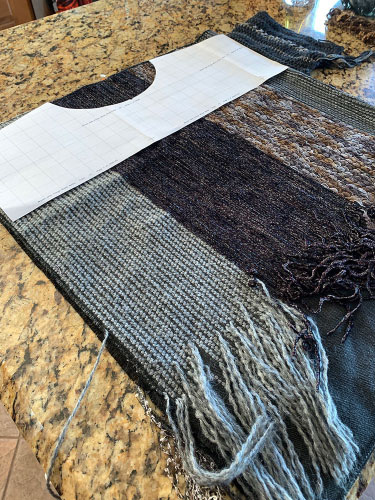
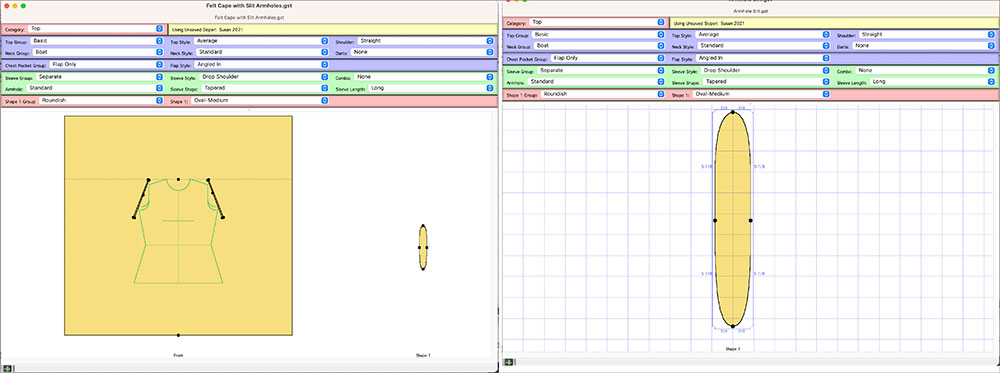
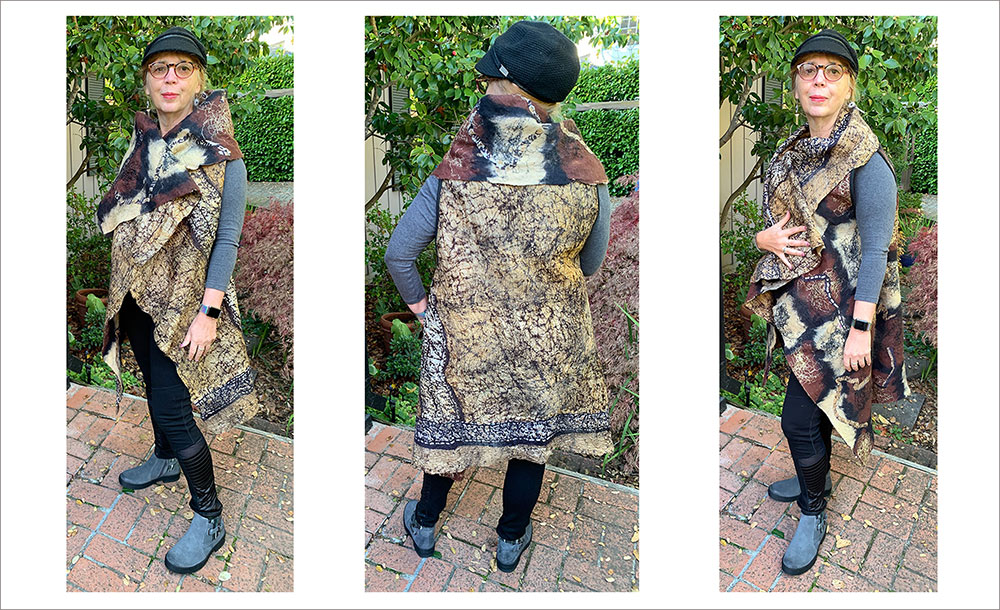
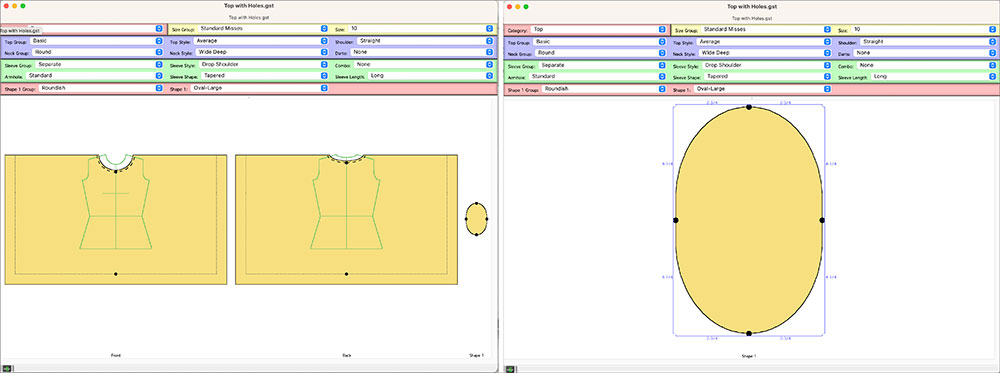
Armhole Slit
When I make certain cape styles out of rectangular pieces like felted fabric, I need to insert an armhole into the larger rectangle of the garment. Here you can see how I built the design, and then planned for the armhole slit. I planned the depth and width of the armhole and used a Generic Shape to create it.
And below is a photo of the finished cape/coat.
Note: The reason I angled the slit on the pattern was because I wanted to introduce some flare into the garment.
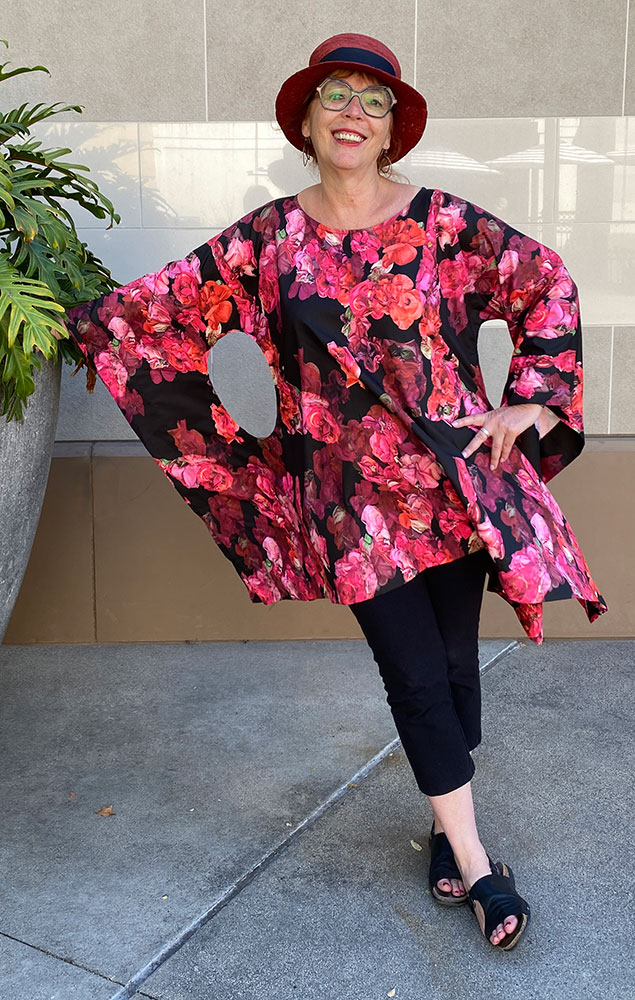
Circle Cut-Out
I recently saw (and purchased) a garment in Venice that was unique in how it was designed. A large circular shape was cut out of the overall garment. So, similar to the above cape project, I build a pattern for the top, and then included a generic shape for the cut-out. I can keep this circle for various other projects, or for reproducing this design quickly again. If I decide to go into mass production of this item, I could use the neckline template and the circle template and simply cut these out of a large rectangular piece of fabric.
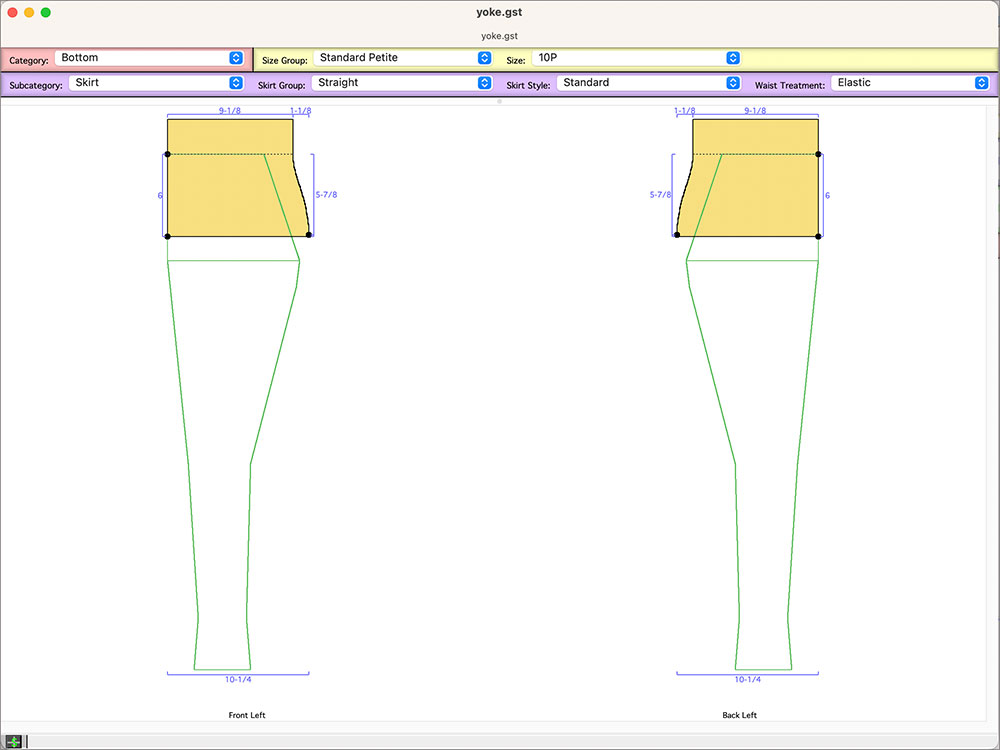
Skirt Yoke
If you like to have yokes on your skirts (or pants), you could make a standard yoke pattern that you would use with varying bottom pieces. The pattern below was developed for an elasticized waist. Basically the skirt pattern was shorted to the level of the yoke depth and the hip point on the side seam was moved upwards. One could attach a variety of bottoms to this.
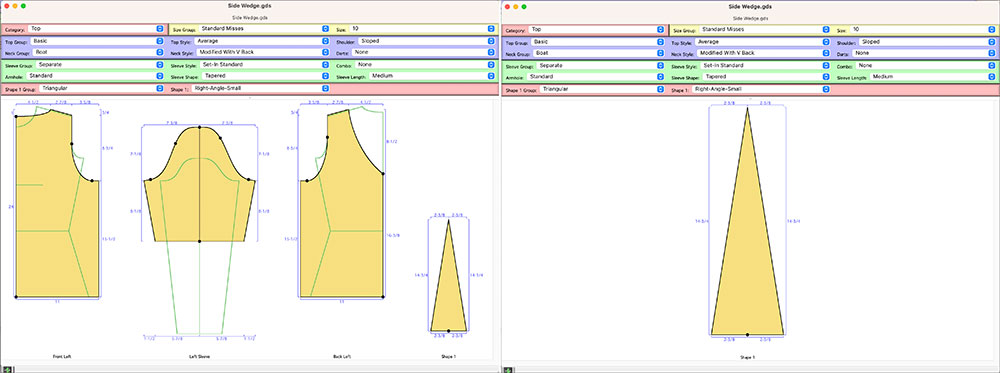
Wedge/Godet
Godets are triangular pieces of fabric that are inserted into a garment to add flare. Most often you will see them in gored skirts, inserted between each panel in the seam. This adds some ‘flip’ to the style. You will also see wedges used at the side seams of tops. This inserted wedge is a great way to add interest while you adjust for a hip-heavy figure. So, why not build a master wedge that would you your basic one for most styles.
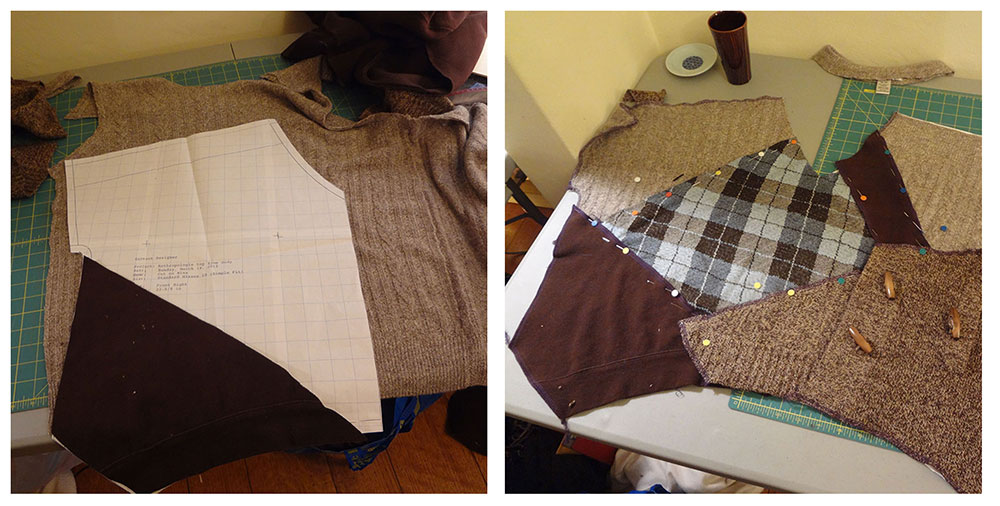
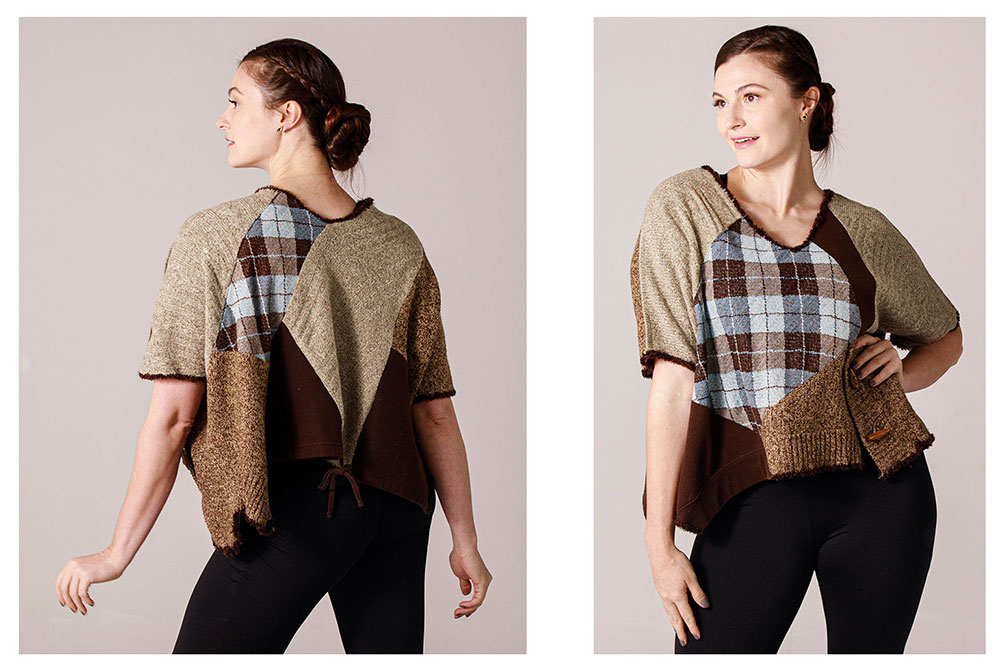
Upcycle Template
If you do a lot of upcycling, it is handy to start with a template pattern that you use as you are laying out fabrics to make a style. Below, you can see the garment pattern I used as my template and the resulting garment.
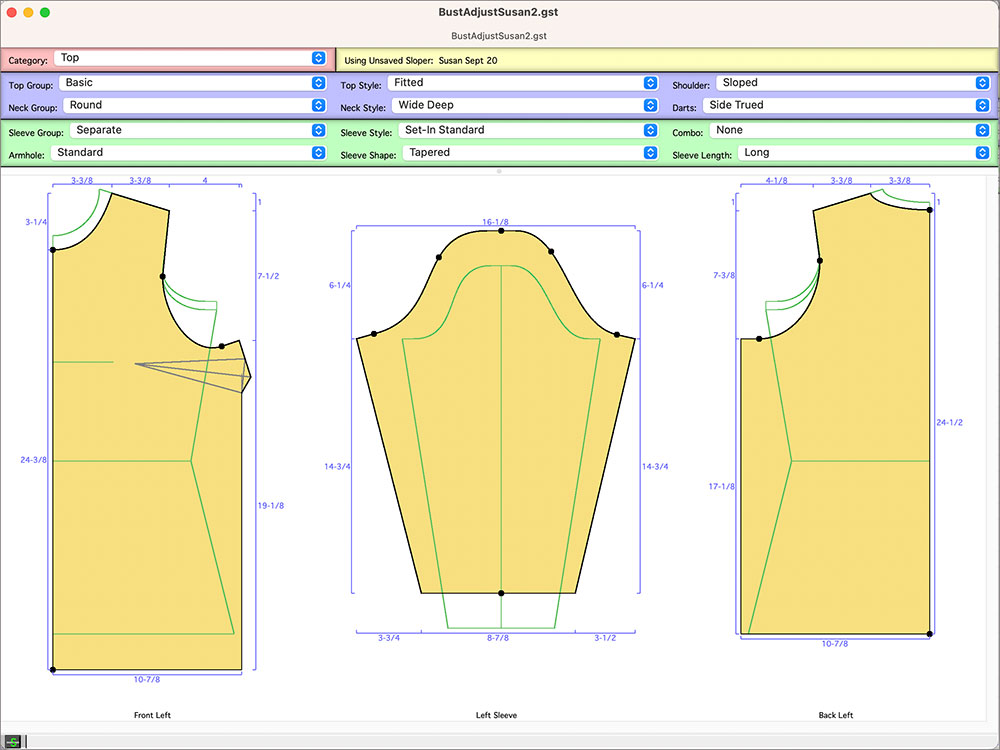
Full Bust Adjustment
If you are large-busted, maybe you will want to make a master pattern that has a Bust Adjustment performed on it. This can be your new starting point. In this case, you could simply load the pattern with the adjustment and continue to design from there. The image below uses an approach that Ursula Hurth, our German Distributor suggests for doing a large bust adjustment.
So, there you have a variety of ideas to run with. Consider creating some templates of your own. We would love to see what other ideas you have for templates, so if you come up with something and would like to share it, email us with your idea, and we can pass it on.
~~ Susan, Creative Director, Designer, Cochenille Design Studio
Want to be notified when we post a new blog entry? Sign up here.